
Master the Sneaker Product Shot Prompt: Dramatic Rim Light Guide
Mastering the Perfect Sneaker Product Shot Prompt: Dramatic Rim Light Techniques
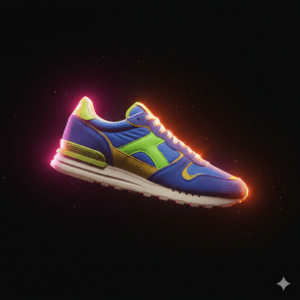
You know that feeling when you scroll through a high-end streetwear feed and a single image makes you stop mid-swipe? It isn’t just the brand or the silhouette; it’s that ethereal, glowing outline that separates the shoe from the shadows. That “halo” is the secret sauce of professional footwear photography. Whether you are a digital artist, an AI enthusiast, or a brand designer, mastering the sneaker product shot prompt dramatic rim light is your ticket to creating visuals that don’t just display a product—they evoke a desire to own it.
In this guide, we will dive deep into the mechanics of “edge lighting,” how to translate photographic theory into AI prompts, and the specific “recipes” you need to make your renders look like they were shot in a million-dollar studio.
The Physics of Hype: Why Rim Lighting Changes Everything

Master the Sneaker Product Shot Prompt: Dramatic Rim Light Guide
Before you start typing into a prompt box, you need to understand why your eyes love this specific look. Rim lighting (also known as backlighting or contour lighting) occurs when the primary light source is placed behind the subject. This creates a thin, bright line around the edges of the sneaker.
For sneakers, this is crucial for three reasons:
Separation: Most high-fashion sneaker shots use dark or moody backgrounds. Without a rim light, a black shoe would disappear into a black background.
Texture Definition: It highlights the “fuzz” of suede, the “sheen” of patent leather, and the intricate weave of flyknit materials.
The “Hero” Effect: It gives the product an almost divine, elevated status. It feels premium because it mimics high-end automotive and luxury watch cinematography.
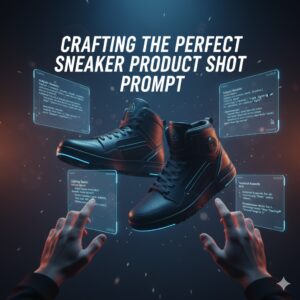
Crafting the Perfect Sneaker Product Shot Prompt: Dramatic Rim Light
Master the Sneaker Product Shot Prompt: Dramatic Rim Light Guide
When you’re working with generative AI like Midjourney, Stable Diffusion, or Flux, you can’t just ask for a “cool shoe.” You have to speak the language of a Director of Photography (DP). To get that sharp, cutting edge, your sneaker product shot prompt dramatic rim light needs to be structured with specific descriptors.
The Anatomy of a High-Performing Prompt
To bypass the “flat” look common in amateur AI generations, structure your prompt using these four pillars:
The Subject: Be specific about the materials. Don’t just say “sneaker.” Say “Deconstructed leather high-top sneaker with translucent sole.”
The Lighting Geometry: Use terms like “rim lighting,” “kicker light,” and “contour illumination.”
The Atmospheric Quality: Mention “volumetric haze” or “dark studio” to give the light something to cut through.
The Camera Lens: Emphasize a “macro lens” or “85mm” to ensure the focus stays sharp on the product lines.
Essential “Ingredients” for Professional Results
Master the Sneaker Product Shot Prompt: Dramatic Rim Light Guide
Think of your prompt as a recipe. If you miss one ingredient, the whole “flavor” of the image shifts. Use the following table to mix and match your technical requirements.
Table 1: Lighting and Material Ingredients
| Component | Keyword to Use | Visual Result |
| Edge Contrast | “Sharp rim light” | A thin, crisp white line around the shoe. |
| Material Pop | “Specular highlights” | Makes plastic or leather parts shine. |
| Mood | “Low-key lighting” | Keeps the rest of the scene dark and moody. |
| Depth | “Anamorphic bokeh” | Creates beautiful blurred lights in the background. |
| Color | “Cyan and Magenta dual-tone” | Adds a futuristic, cyberpunk vibe to the edges. |
5 Advanced Prompt Formulas You Can Use Today
If you’re looking for that “magazine-ready” look, try these specific formulas. Simply replace the bracketed sneaker description with your specific model.
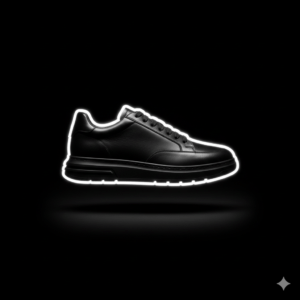
1. The “Vantablack” Luxury Look
“A [Black Leather Luxury Sneaker] floating in a void, intense white sneaker product shot prompt dramatic rim light, sharp edges, hyper-realistic, 8k, photorealistic, cinematic shadows, high contrast, minimalism.”
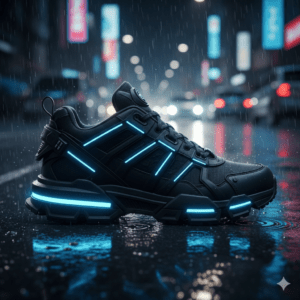
2. The Cyberpunk Neon Edge
“Side profile of a [Futuristic Techwear Shoe], neon blue rim lighting, dark rainy street background, reflections on wet pavement, volumetric lighting, ray tracing, sharp focus on stitching.”
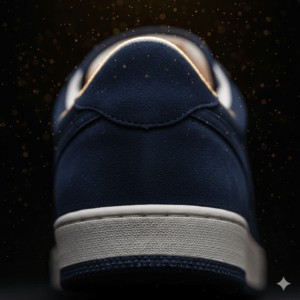
3. The Macro Texture Study
“Macro close-up of a [Suede Sneaker Heel], dramatic golden rim light, dust particles catching the light, shallow depth of field, f/2.8, professional advertising photography, rich textures.”
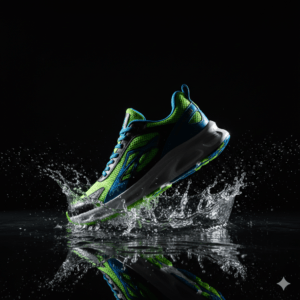
4. The “Liquid Action” Shot
“A [Sport Sneaker] splashing through a thin layer of water, rim light catching every droplet, dark studio setting, high speed photography, crisp edges, dramatic chiaroscuro style.”
5. The Retro Synthwave Aesthetic
“1980s inspired [Retro Runner], dual rim lights in pink and orange, soft haze, grainy film aesthetic, nostalgic but high resolution, sharp silhouette separation.”
Fine-Tuning Your Results: Avoiding Common Pitfalls
Even with the right sneaker product shot prompt dramatic rim light, you might find the results aren’t quite hitting the mark. Here is how you can troubleshoot your generations:
The Light is Too “Washy“: If the light is hitting the front of the shoe too much, add “–no soft lighting” or “heavy shadows” to your negative prompt. You want the light to stay on the perimeter.
Muddled Textures: If the shoe looks like plastic, specify the material. “Grained leather” or “perforated mesh” forces the AI to render how light interacts with those specific surfaces.
The Background is Distracting: A rim light needs a dark canvas. Use phrases like “Obsidian background,” “Matte black studio,” or “Midnight shadows” to ensure the light has something to contrast against.
FAQ: Solving Your Lighting Challenges

How do I get a “colored” rim light in my sneaker product shot prompt?
To achieve a colored glow, specify the “gel” color. For example: “Sneaker with a sharp emerald green rim light.” This tells the AI to treat the light source as if it has a physical colored filter over it.
Can I use these prompts for 3D rendering software like Blender?
Yes. While these are written for AI, the terminology is universal. In a 3D environment, you would place a “Area Light” or “Point Light” slightly behind and to the side of your sneaker model to achieve the same sneaker product shot prompt dramatic rim light effect.
What is the best aspect ratio for sneaker shots?
For social media, use --ar 4:5. For high-end lookbooks, a wider --ar 16:9 allows the rim light to create a sense of scale and movement across the frame.
Why does the “rim light” sometimes look like a glow?
If you use terms like “soft” or “diffused,” the rim light will bleed into the center of the shoe. If you want a hard, sharp edge, use the word “Kicker” or “Contour” instead.
Taking Your Imagery to the Next Level
You have the tools, the terminology, and the templates. Now, it’s time to experiment. The beauty of the sneaker product shot prompt dramatic rim light is its versatility. It can turn a simple sneaker into a piece of art, a marketing powerhouse, or a centerpiece for your portfolio.
Don’t settle for flat, “out-of-the-box” AI renders. Use the interplay of shadow and light to tell a story about the product. Whether it’s the ruggedness of an outdoor boot or the sleekness of a racing flat, let the light define the character.
Ready to create your own “Hype” visuals?
If you’re struggling to get the exact material or brand style right, I can help you refine your technical descriptions.
Would you like me to generate a custom, high-detail prompt for a specific sneaker model or colorway you’re working on?