
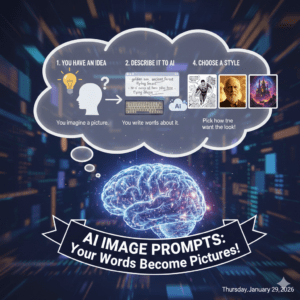
How to Write Prompts That Actually Match What You Imagine
MidJourney Prompts Step by Step: How to Write Prompts That Actually Match What You Imagine
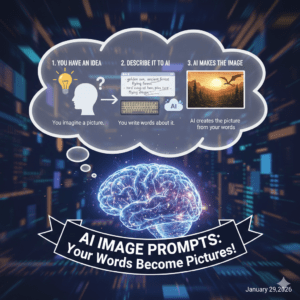
You’ve probably had this moment: you type what feels like a clear idea into MidJourney, hit enter, and the result looks… close, but not quite. The character’s face is wrong. The lighting is flat. The style drifts. Or the composition feels random.
That gap between what you meant and what MidJourney made isn’t a talent issue. It’s a prompt structure issue.
This guide shows you MidJourney prompts step by step, so you can move from “trial and error” to “repeatable results.” You’ll learn a simple framework, the exact prompt “ingredients” you should include, and how to refine prompts quickly without starting from zero.
Why MidJourney Prompt Writing Feels Hard (And Why It Doesn’t Have To)
MidJourney doesn’t read your mind. It reads patterns. When your prompt is vague, the model fills the gaps with whatever patterns it has seen most often. When your prompt is specific and well-structured, you’re giving it fewer choices—so the output becomes more aligned with your intent.
Your goal isn’t to write a long prompt. Your goal is to write a clear prompt.
MidJourney Prompts Step by Step: The 5-Part Prompt Framework
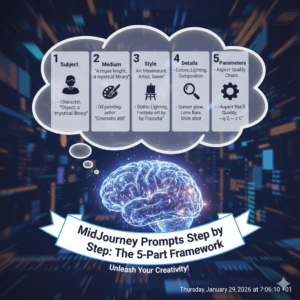
Think of your prompt like a recipe. If you skip the ingredients, the outcome is unpredictable. Use this step-by-step structure and your results get dramatically more consistent.
Step 1: Define the subject (what the image is about)
Start with the main subject in plain language. Then add 2–4 details that narrow it down.
Good subject details include:
- Who/what it is (person, object, place)
- Age, features, materials, colors
- Action or pose
- Setting context (where it is)
Example (weak → strong):
- ❌ “a woman”
- ✅ “a 30-year-old woman in a tailored black blazer, confident expression, standing in a modern office lobby”
Tip: If you can’t picture it in your head, MidJourney can’t either. Add one more detail.
Step 2: Choose a style direction (how it should look)
Style is where your image becomes “you.” Decide whether you want photography, illustration, 3D, anime, cinematic, etc.
Style keywords you can use naturally:
- ultra-realistic photography
- cinematic film still
- editorial fashion shot
- watercolor illustration
- 3D render
- minimal vector art
Example add-on:
- “cinematic film still, realistic skin texture, subtle grain”
Tip: Avoid mixing too many styles in one prompt (e.g., “anime + photorealistic + watercolor”). Choose one main style, then one supporting flavor.
Step 3: Control lighting and mood (how it should feel)
Lighting and mood are what make images look premium. You’re not just generating an object—you’re shaping the atmosphere.
Lighting ideas:
- soft natural light
- dramatic rim light
- studio lighting
- golden hour
- neon glow
Mood ideas:
- calm, intimate, nostalgic
- futuristic, tense, mysterious
- warm, joyful, dreamy
Example add-on:
- “soft natural window light, warm tone, calm mood”
Tip: If your output looks “generic,” improve lighting first. It’s often the fastest upgrade.
Step 4: Add composition + camera cues (how it’s framed)
This step tells MidJourney where the viewer is.
Composition cues:
- close-up portrait
- wide shot
- overhead shot
- centered composition
- rule of thirds
- depth of field
Camera cues (for realistic looks):
- 35mm lens, 85mm lens
- shallow depth of field
- bokeh background
- sharp focus
Example add-on:
- “85mm lens, close-up portrait, shallow depth of field, bokeh”
Tip: Portraits often look best with 50–85mm cues. Landscapes often benefit from “wide angle” and “epic scale.”
Step 5: Use parameters to lock the result (quality + format control)
MidJourney parameters help you keep consistency across outputs. Even if your text is perfect, missing parameters can derail your result.
Common parameters to learn:
--araspect ratio (e.g., 1:1, 16:9, 9:16)--stylizehow artistic vs literal--chaoshow varied outputs are--qualityrendering effort (when supported)
Example:
--ar 16:9 --stylize 200 --chaos 5
Tip: For social media vertical images, --ar 9:16 is your best friend.
The Prompt “Recipe” You Can Reuse Every Time
Use this prompt formula whenever you’re stuck:
Subject + Key details + Style + Lighting + Mood + Composition/Camera + Parameters
Copy-ready template
- “[Subject], [details], [style], [lighting], [mood], [composition/camera] –ar [ratio] –stylize [value]”
Example (complete)
“a handmade ceramic coffee mug on a wooden table, steam rising, small crumbs nearby, ultra-realistic photography, soft natural window light, cozy morning mood, close-up shot, shallow depth of field, 50mm lens –ar 4:5 –stylize 150”
Prompt Ingredients Table (Think Like a Recipe)
| Prompt Ingredient | What it controls | Quick examples |
|---|---|---|
| Subject | The core idea | “a cyberpunk street vendor” |
| Details | Precision | “rainy night, neon signs, busy crowd” |
| Style | Visual language | “cinematic film still, realistic” |
| Lighting | Realism + vibe | “rim light, soft glow, golden hour” |
| Mood | Emotion | “mysterious, warm, dramatic” |
| Composition | Framing | “wide shot, close-up, overhead” |
| Parameters | Output control | --ar 16:9, --chaos 10 |
7 High-Impact MidJourney Prompt Examples (Steal These Structures)
- Cinematic portrait
“a young man with freckles, contemplative expression, cinematic film still, dramatic side lighting, shallow depth of field, 85mm lens, subtle grain –ar 2:3 –stylize 200” - Product shot (e-commerce)
“a minimalist skincare bottle on white marble, soft studio lighting, clean premium aesthetic, sharp focus, subtle reflections –ar 4:5 –stylize 100” - Fantasy environment
“ancient floating island with waterfalls, golden sunrise, epic scale, atmospheric haze, wide shot, ultra-detailed –ar 16:9 –stylize 300” - Architecture visualization
“modern glass house in a forest, dusk lighting, warm interior glow, wide angle, realistic materials, high detail –ar 16:9 –stylize 150” - Food photo
“fresh strawberry tart on a ceramic plate, powdered sugar, natural window light, cozy mood, close-up, 50mm lens –ar 4:5 –stylize 120” - Street photography
“busy Tokyo alley, rain reflections, neon lights, candid street photo, cinematic mood, sharp focus –ar 3:2 –stylize 200” - Minimal vector illustration
“flat vector illustration of a workspace desk, clean lines, limited palette, modern UI style, centered composition –ar 1:1 –stylize 50”
Common MidJourney Prompt Mistakes (And Fast Fixes)
You’re being too vague
Fix: Add 2–3 concrete details: material, time of day, lighting, camera.
You’re mixing too many styles
Fix: Pick one main style and one supporting modifier.
Your output keeps changing
Fix: Use consistent parameters, and keep your structure stable between iterations.
Your image looks “AI-ish”
Fix: Add realistic cues: natural lighting, lens, depth of field, subtle grain, imperfections.
How to Improve a Prompt in 60 Seconds (Without Starting Over)
When your result is close but not perfect, don’t rewrite everything. Adjust one layer at a time:
- Subject clarity: add or remove a detail
- Lighting: switch to “soft natural light” or “dramatic rim light”
- Composition: change “wide shot” to “close-up”
- Parameters: lower chaos, adjust stylize, fix aspect ratio
This keeps your creative direction steady while you refine the output.
Conclusion: You Don’t Need Luck—You Need a System
Once you follow MidJourney prompts step by step, you stop guessing and start directing. Your results become repeatable. Your style becomes consistent. And your images begin to look intentional—like you planned them, not like you hoped for them.
Call to action (engagement)
If you want, paste one prompt you’ve tried (and tell me what you wanted vs what you got). I’ll rewrite it using this step-by-step framework and give you 3 improved versions: one realistic, one cinematic, and one stylized.